
If you’re craving a rich, creamy cheesecake filling that’s both quick and easy to make, look no further than this Philadelphia cheesecake filling . Whether you’re planning a classic cheesecake, a no-bake version, or just need a luscious filling for pies and tarts, this simple recipe has got you covered. The secret to its incredible creaminess? Philadelphia cream cheese, of course! It’s the perfect base for a filling that’s smooth, velvety, and effortlessly delicious.
What’s even better? You can whip this filling up in just minutes, saving you time without sacrificing flavor. No baking required unless you’re going for the classic, of course. Imagine topping it with fresh berries, a drizzle of chocolate, or even a homemade graham cracker crust. The possibilities are endless!
Ready to make a dessert everyone will love? Let’s dive into this easy cheesecake filling recipe and get started!

Jump to :
Key Benefits of Philadelphia Cheesecake Filling
When it comes to making a creamy cheesecake filling, using Philadelphia cream cheese makes all the difference. But what makes this filling so special? Let’s break it down:
- Smooth, Velvety Texture: The richness of Philadelphia cream cheese creates a cheesecake filling that’s perfectly smooth and silky. Unlike other cream cheeses, Philadelphia delivers a consistency that’s both luxurious and easy to work with. No lumps, just that perfect velvety bite you crave in every cheesecake.
- Quick and Easy to Make: This recipe is all about simplicity. In just a few minutes, you’ll have a filling ready for any occasion, whether you’re making a no-bake cheesecake, a layered pie, or topping a dessert. Minimal ingredients, minimal effort, maximum flavor what’s not to love?
- Versatile for Any Dessert: Whether you’re sticking with the classic cheesecake or mixing things up with a no-bake cheesecake, this filling works for just about any dessert you can dream up. You can easily modify it for different flavors add lemon zest for a refreshing twist, or melted chocolate for a rich indulgence. This flexibility is what makes this cheesecake filling so beloved.
- Perfect for No-Bake Recipes: If you’re short on time or don’t want to turn on the oven, this filling is your best friend. The no-bake cheesecake version is just as delicious as its baked counterpart and comes together effortlessly. Simply chill it in the fridge, and you’ve got a treat that’s ready to impress in a fraction of the time.
- Family-Friendly: Kids love it, adults rave about it it’s a crowd-pleaser for any occasion. Whether you’re hosting a holiday dinner, celebrating a birthday, or just treating yourself, this filling brings comfort and nostalgia, all in one bite.
By using Philadelphia cream cheese as the base, you’re not just making a filling; you’re creating an indulgent, dreamy dessert that will elevate any dish. Ready to see how simple and satisfying it can be? Let’s move on to the ingredients!
Ingredients for Philadelphia Cheesecake Filling

Let’s talk about the ingredients that make this Philadelphia cheesecake filling so irresistibly smooth and delicious. Don’t worry, you won’t need anything fancy just a handful of simple, high-quality ingredients that come together to create magic. Here’s what you’ll need:
Key Ingredients:
- Philadelphia Cream Cheese (16 oz) – This is the star of the show!Ensure it’s softened to room temperature before starting. Softening it allows for a smooth, lump-free filling that’s easy to mix. If you forget to take it out ahead of time, you can microwave it in 10-second intervals to soften it quickly.
- Heavy Cream (1 cup) – Heavy cream adds that rich, velvety texture that makes this filling so creamy. Don’t substitute with light cream or milk you want the full richness here for the best results.
- Granulated Sugar (1/2 cup) – A bit of sweetness balances out the tanginess of the cream cheese. Feel free to adjust the amount depending on how sweet you want your filling to be.
- Vanilla Extract (1 tsp) – Pure vanilla extract elevates the flavor of your filling, giving it a deep, aromatic sweetness. It’s a minor addition, but it has a significant impact!
Optional Ingredients for Extra Flavor:
- Lemon Zest (1 tsp) – For a bright, refreshing kick, a little lemon zest goes a long way. This is perfect if you want to add some tanginess to balance out the richness of the cream cheese.
- Powdered Sugar (1/4 cup) – If you’re looking for an ultra-smooth finish (especially for no-bake cheesecakes), powdered sugar is a great addition. It dissolves easily and doesn’t leave any graininess, helping you achieve that perfect texture.
- Whipped Cream (1/2 cup) – If you want a lighter, fluffier filling, whipped cream is your secret weapon. Fold it in gently for a more airy texture, perfect for no-bake cheesecakes or lightening up the filling for other desserts.
Pro Tip
If you’re making a no-bake cheesecake or a pie with this filling, be sure to chill it for a few hours (or overnight if you can wait that long!). This will help the filling firm up and hold its shape when served, giving you that perfect slice every time.
Now that you’ve got all the ingredients, you’re ready to start mixing! Keep in mind that the quality of your cream cheese matters here Philadelphia cream cheese is known for its smooth texture and tangy flavor, so it really is worth using the real deal for this recipe. Let’s move on to the next step and bring this creamy filling to life!
Instructions for Making Philadelphia Cheesecake Filling

Now that you have all the ingredients ready, let’s dive into the steps for making your Philadelphia cheesecake filling. This part is as simple as it is satisfying, and in just a few minutes, you’ll have a silky, creamy filling that’s perfect for cheesecakes, pies, or whatever dessert you’re craving. Here’s how to do it:
Step-by-Step Instructions:
- Soften the Cream Cheese:
Start by softening your Philadelphia cream cheese. Allow it to sit at room temperature for approximately 30 minutes before using. If you’re in a hurry, cut the cream cheese into small chunks and microwave it in 10-second bursts until it’s soft, but not melting. - Beat the Cream Cheese:
In a large mixing bowl, use a hand mixer or stand mixer to beat the softened cream cheese. Beat it on medium speed for about 1-2 minutes, until it’s smooth and lump-free. This is the base for your rich, creamy filling. - Add the Heavy Cream and Sugar:
Gradually add the heavy cream and granulated sugar to the cream cheese. Continue mixing until the mixture is fully incorporated and starts to thicken. The heavy cream gives the filling its luxurious, velvety texture, while the sugar adds just the right amount of sweetness. - Incorporate the Vanilla and Optional Flavorings:
Add the vanilla extract (and lemon zest if you’re using it). Mix until everything is smooth and well combined. If you want a lighter, fluffier filling for a no-bake cheesecake, gently fold in the whipped cream at this stage. This will make your filling airy and perfect for those no-bake desserts. - Check the Texture:
At this point, your filling should be smooth, creamy, and thick. If it feels too runny, simply add a little more powdered sugar, a tablespoon at a time, until it reaches your desired consistency. For a no-bake cheesecake, it’s essential to let the filling firm up in the fridge for a few hours, so don’t worry if it’s still a little soft at this stage. - Chill (Optional, for No-Bake Cheesecake):
If you’re making a no-bake cheesecake or using the filling in a pie, transfer it to your prepared crust (whether it’s a graham cracker crust, Oreo crust, or another base). Place the dessert in the fridge and let it chill for at least 2 hours, or overnight if you have the time. This allows the filling to set properly.
Pro Tips for Perfect Cheesecake Filling:
- Room Temperature Ingredients: Softening the cream cheese is crucial for a smooth filling. Cold cream cheese will result in lumps that are difficult to blend out.
- Whipping for Lightness: If you’re making a no-bake cheesecake and want an even fluffier texture, fold in some freshly whipped cream. Just be careful not to overmix after adding the whipped cream gentle folding keeps the airy texture intact.
- Flavor Variations: Want to get creative? Add melted chocolate for a chocolate cheesecake filling, or swirl in some fruit puree (like strawberry or raspberry) for a fruity twist.
- Avoid Overmixing: Overbeating the mixture can lead to a dense filling, so be sure to mix just enough to incorporate the ingredients fully.
Pro Tips and Variations for Your Philadelphia Cheesecake Filling
Let’s take your Philadelphia cheesecake filling to the next level with some easy tips and fun flavor variations!
Pro Tips for the Perfect Filling
- Room Temperature Ingredients: Softened Philadelphia cream cheese is a must for a smooth, lump-free filling. Let it sit at room temp for 30 minutes before mixing.
- Avoid Overmixing: Mix until everything is combined and smooth. Overmixing can make the filling too dense, especially for a no-bake cheesecake.
- Chill to Set: For the best results, chill your cheesecake for at least 2 hours to allow the filling to firm up and hold its shape.
Flavor Variations
- Lemon: Add lemon zest (and juice, if you like) for a bright, citrusy flavor.
- Chocolate: Melt dark or semi-sweet chocolate and blend it in for a rich, chocolatey twist.
- Berry Swirl: Swirl in fresh berry puree for a fruity burst of flavor and a pretty visual effect.
- Caramel: Stir in caramel sauce for a sweet, indulgent touch.
- Pumpkin Spice: Add pumpkin puree and spices for a fall-inspired cheesecake.
Customizing for Dietary Needs
- Dairy-Free: Swap Philadelphia cream cheese with a dairy-free version like cashew or coconut cream cheese and use coconut cream instead of heavy cream.
- Lower-Sugar: Replace sugar with stevia or monk fruit for a healthier alternative.
With these tips and variations, you can easily customize your filling to fit any occasion or flavor preference!
Serving Suggestions for Philadelphia Cheesecake Filling

Now that your Philadelphia cheesecake filling is ready, it’s time to serve! Here are a few simple and flavorful suggestions:
Classic Cheesecake
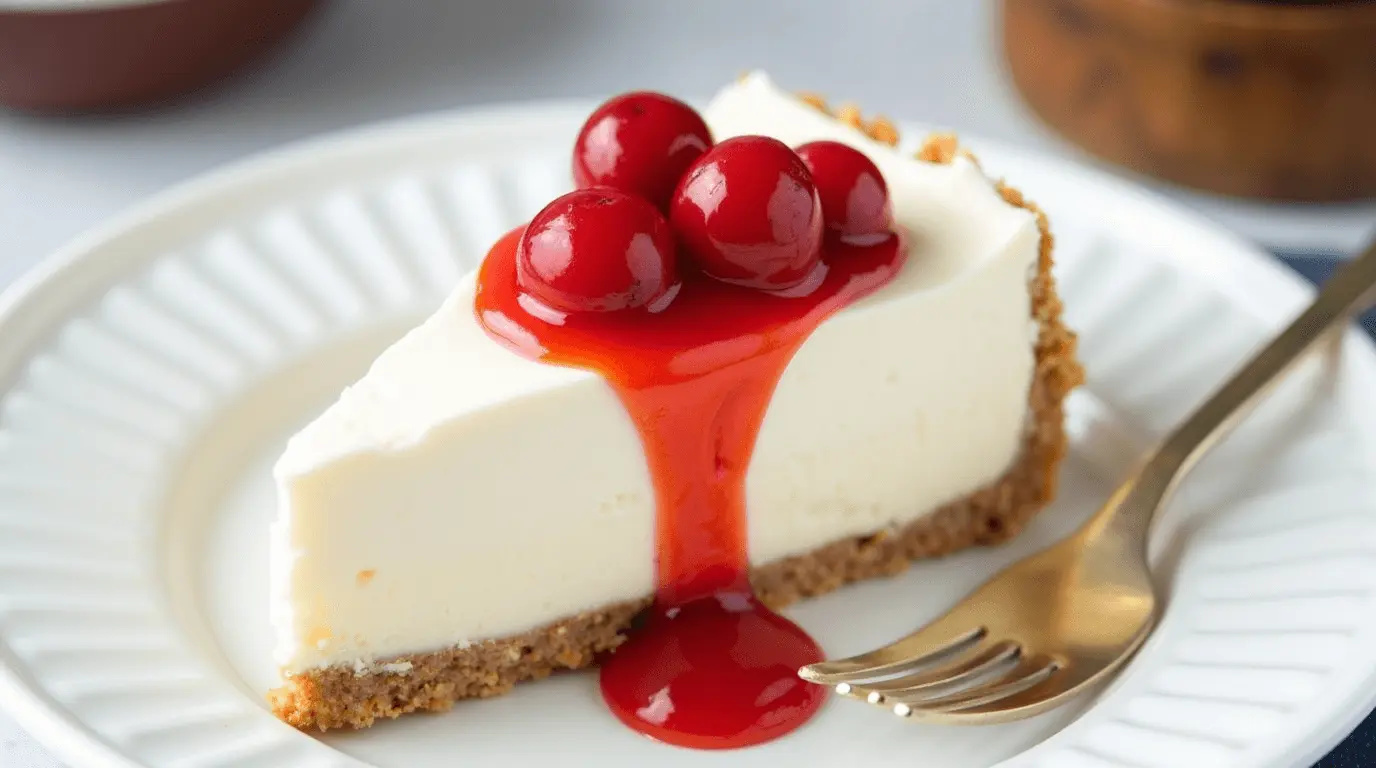
- Graham Cracker Crust: For a traditional cheesecake, pour the filling into a graham cracker crust and bake or chill. Top with fresh fruit or fruit compote for extra flavor.
- Fruit Toppings: Fresh berries or sliced fruit make a perfect, light topping for the rich filling.
No-Bake Cheesecake
- Chilled Cheesecake: Spoon the filling into a pre-made crust and refrigerate for a few hours. Top with whipped cream or fruit for a quick, no-bake dessert.
- Mini Cheesecakes: Divide the filling into mini crusts or jars for individual servings—great for parties!
Cheesecake Parfaits
- Layered Desserts: Layer your filling with granola, fruit, or crushed cookies in small jars or cups for a fun, personalized treat.
Tarts and Pies
- Tart Shells: Spread the filling into tart shells or pie crusts and top with fruit or caramel for an elegant dessert.
Sauces and Drizzles
- Fruit Sauce: Top with homemade or store-bought fruit compote for a sweet, tangy contrast.
- Chocolate Ganache: Drizzle melted chocolate ganache over the cheesecake for a rich touch.
Pro Tip:
- Make-Ahead: This filling can be prepared in advance and stored in the fridge for a stress-free dessert on busy days or special occasions.
With these simple ideas, your Philadelphia cheesecake filling will shine in every dessert! Enjoy!
FAQs about Philadelphia Cheesecake Filling
Here are quick answers to some of the most common questions about making Philadelphia cheesecake filling:
1. Is it okay if I use a different brand of cream cheese?
While you can, Philadelphia cream cheese gives the smoothest texture and best flavor for cheesecake. Other brands may work, but results can vary.
2. Can I make this filling ahead of time?
Yes! You can make it up to 2-3 days ahead. Just cover it and refrigerate. Stir before using.
3. Can I use dairy-free cream cheese?
Yes! Dairy-free and vegan cream cheese alternatives like cashew or coconut-based versions work well, though the flavor may differ slightly.
4. How do I make the filling thicker?
If it’s too runny, add more powdered sugar or chill the filling for a few hours. You can also fold in whipped cream for a thicker texture.
5. Can I freeze the filling?
Yes, it can be stored in the freezer for up to 2 months. Refrigerate it overnight to thaw, then stir before using.
6. Can I add flavorings to the filling?
Absolutely! Add lemon zest, vanilla, melted chocolate, or fruit purees to personalize the flavor.
7. How do I know if the filling is the right consistency?
It should be smooth, creamy, and thick enough to hold its shape. If it’s too runny, chill it longer or add a bit more powdered sugar.
Now you’re ready to make the perfect Philadelphia cheesecake filling every time! Enjoy!
If you loved this creamy Philadelphia cheesecake filling, be sure to check out our No-Bake Cheesecake recipe for an easy and indulgent dessert that’s sure to impress!
For more delicious recipes, baking tips, and creative ideas, be sure to follow us on social media! Join our community on Facebook, Instagram, and Pinterest for exclusive updates, behind-the-scenes content, and easy-to-follow recipes that will inspire your next culinary adventure. Don’t miss out click the links and stay connected!
1 thought on “Creamy Philadelphia Cheesecake Filling in Minutes”